Category Archives: Home Project

Finished with Noah’s Ark 2 quilt

      While he’s laying on the couch, I pinned the Noah’s Ark quilt to get it ready for quilting. I wanted to go visit my friend Ayna, but everyone has been sick with the flu. It just didn’t work out. So, she was here for morale support on Skype. She made this owl pillow from the tutorial here.

 It turned out so cute.  She added a cute pocket and a cute embroidered the name on it. Cute, cute, cute.  I told her our whole family needs one with each of our names on it. So, I am trying to come up with an idea of something amazing to make for her. I am at a loss. Any ideas???


 I did a basic meander pattern in the middle. I echoed the white in the pinwheels and a border back and for the snake like pattern in the white polka dot border. I did a simple binding by  wrapping the fabric to the front. This is my favorite method.

This is a one of a kind and available for purchase here.


 The Noah’s Ark Quilt 2 came out good. Now, I can say that I’ve done pinwheels . I enjoyed it.
 
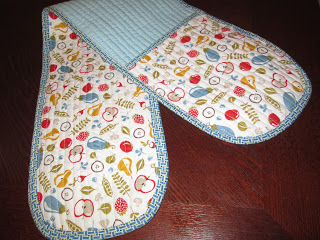
I went to a bridal shower, and I made this double potholder. Tutorial here.
 
 
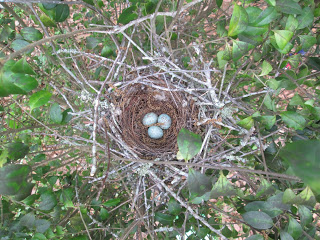
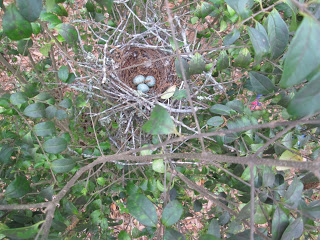
The kids found a bird nest. The eggs are really pretty. We are not sure what the actual bird is called. We think it’s a sparrow. Now, there are 4 eggs.


This is Jared’s room. His carpet was trashed, and Roxie tore it at the entrance to the door. So, we put duck tape on the threshold. It was not appealing. Home Depot had an amazing deal on laminate, and this is what happens. I think we are reno crazy.


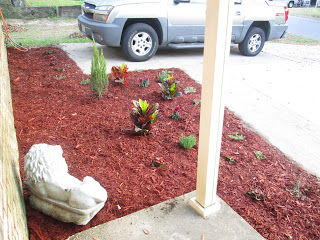
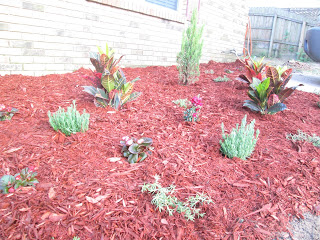
This was a bunch of weeds and a really ugly bush. We went and looked at pavers, but ended up with flowers, and one long morning putting these in these plants.  The entry planting took place two weeks after laying the flooring in Jared’s room. This is exactly what I am talking about reno crazy.  This is my first attempt at gardening, or just dealing with plants. We actually have two lemon trees that need to be planted in the backyard.


I am blogging two weeks after the front plants were put in, and we just knocked down my Mother-in-law’s screened in porch. I am tired and sore.  I am sure in the recesses of my mind, I am thinking of another Reno (living room) hahaha.
 
Blog at ya later.


Rail Fence or Zigzag Quilt Tutorial


     This is the rail fence or zigzag quilt. It’s my work in progress. I decided to just share what I have done at this point. It’s simple and yet pretty boring. It isn’t holding my attention very well. I decided to do this in two colors, but you can do as many as you like. I think this would be a great beginner’s quilt.

     Blogging has become a bit more difficult. I don’t have the laptop anymore.  It was the victim in the break-in.  No one was hurt. So, we were lucky there. We are borrowing  a desktop for now, and it can get really uncomfortable to sit here. I was using the kitchen chair. Pooie on that, I got hubby to move the sewing/office chair in the living room.  Also, my camera finally bit the dust. I am never ever ever.. buying a cheap camera agian…my ode to Taylor Swift (my son loves that song). I have worked on several quilts since the last posting. There are pictures of them in this post.

 I cut out each of my 3 inch strips from each fabric width. Placed them right sides together.
 I sewed them together with the 1/4 inch seam. Open it up and press.
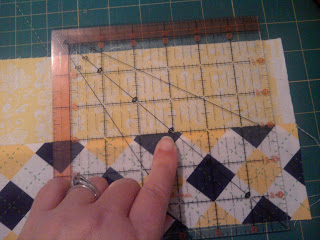
I used the seam to square up the end and take off the selvage to the right of the ruler. I am only cutting one strip here, but you can layer these strips and cut. Total time saver. 
I flip it around and lay the ruler down lining it up with the middle seam and cut out 5 1/2 inch sections. Follow your seam the best you can. I can be prone to veering off a little. It’s okay. Perfection is a dream.
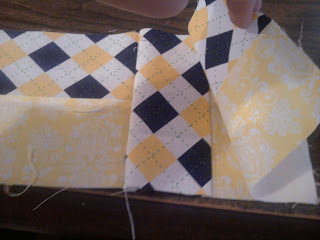
 Next, I place the blocks in sequence. Sew them right sides together. Open it and press. Then, continue as shown above making it the size you prefer.
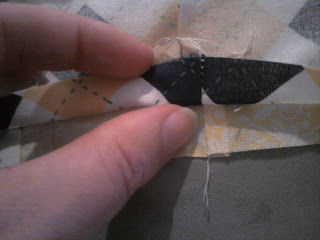
Once the blocks are sewn together, pin each seam to line up.
Pin it at every seam.
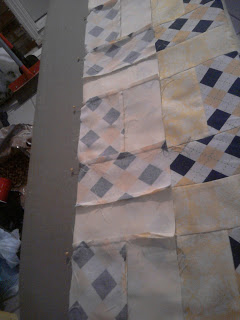
It will look like this. Take and sew down the side and continue from the beginning. I will continue my efforts to keep pushing through the boredom.

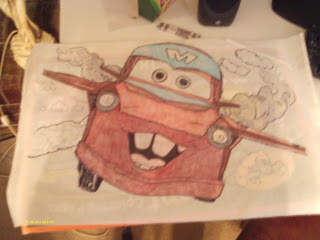
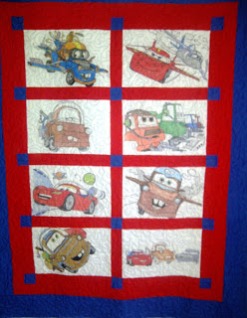
Here, I used a giant sized coloring book and copied to white fabric with a sharpie in medium and fine.  Then, I just colored it. I used regular crayon. Once they were colored, I took some fabric that you don’t care about lay it on your ironing surface. Then, placed the  picture side down and iron. Moving the iron slowly. This is setting the crayon. You will see the crayon almost come through the back. It was fun. I really enjoyed making these two.

Mater!

  
It was fun. I really enjoyed making these two.
I did Tinkerbell too.
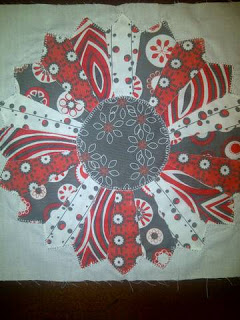
I got a Dresden template with pattern. This is the mock up to see how hard it will be to get it together. It’s not that hard, but I think I have worked out the kinks. I will also make a tutorial on this one too. These were scraps that were leftover from the table runner on point. I’m glad that I saved them. Fabric can always be put to good use.
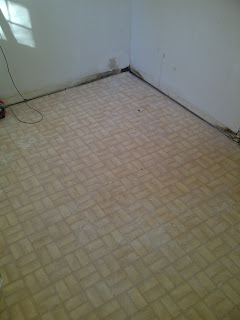
We are also in the renovation process again. I found an amazing deal on tile for the laundry room. It was dreadful, and the popcorn ceiling was falling down. Part 1 of reno happened last weekend. Me and hubby scraped the ceiling. Bye bye popcorn! We took off the door casings and baseboard. Jason, Daniel (brother-in-law), and Jeremy (family friend and pretty much family) helped with pulling up the linoleum. It really wanted to stay there. That punched it up a notch on the difficulty level. While they were inside doing that, me and Terrie (sister-in-law) were outside sprucing up the accesories. We had two shelves that were wood. We painted those. The brackets were spray painted. The breaker box cover was also spray painted. I was scared of spray paint. Really, it wasn’t that difficult. I made a beginner mistake of putting them on newspaper. Bad idea. Who’s idea was it?? Not me..haha. Cardboard works great. We mudded and sanded the ceiling and walls. We painted the ceiling and walls. This weekend will be part 2 laundry reno.
Part 2 laundry reno. We took out the hot water tank. Jason had to replace the shutoff valve. I was sad to take out that hot water tank. It’s still in the den. We are clean though. Don’t worry. We laid the tile with Daniel’s assistance. I was in it too. Slapping on the thinset and troweling it out. We placed the tiles and used the spacers. Then, let it sit over night. The next day, back to it again. This time it was the grout we were slapping on and pushing into the cracks. We washed that floor so many times. Hubby says 9. I was thinking 7. He could be right. If we would’ve been better at skimming off the grout, we wouldn’t have had to wash so much. Lesson learned. The baseboard was cut right before dark. We set it in here for the pic. I still have to paint them. I am truly sore. I laid in bed yesterday and today thinking, what part hurts the most? I couldn’t decide. So, I left it at the whole thing hurts. It’s so worth it, though. It really looks great.
We recently got a new member to the family. This is Roxie our French Bulldog. She is so pretty, and she loves to cuddle. Tinkerbell and her are surprisingly getting along well. I am glad you stopped by to share all this with me. Blog at ya later.


Update on block by block,additions to the den, and a quick block

IMAG0532    IMAG0531
     It has taken me longer than expected on the block by block quilt.  It really seems like it is taking forever. I am just a busy mommy and housewife.  I really should never put myself on a time schedule for my quilts. I do it because it is exciting and fun. I don’t want that to change. Plus, it usually relaxes me to sew. All I’ve been thinking is that people are waiting on this quilt to be finished. To those of you who are, please be patient with me.  One of the corner pieces is just a little to small. Now, I need to get the  seam ripper and  reset it.  Boo…I was so ready to put those borders on that quilt. This block by block is a new process for me.  A couple times, I sewed the wrong side. I  mean, how in the world did it get turned around from the bed to the den. Frustrating. I take that seam out and fix it. Only to realize that I have sewn the binding strip right side up. You would think, I could catch these things. I know, it happens. I guess I can say that I am becoming a professional at the seam ripper. Ha! I can do that fast!   So, it is still in progress…
IMAG0530 There’s always that one thing. Grr….
The above photo is taken of the longest seam. This is just a little tip for ya.  You can  that I rolled the  side that will be going to the right of the needle. I pinned to hold it in this  position. This will keep it from being to bulky while going under the throat of the machine.  My spare time is what I rely on to finish my quilting and work on …other sewing projects. Hehehe.. Here’s what I have been working on in the mean time.
     I got hubby to help with some projects on the Honey Do List. First, I wanted to condense the amount of things taking over the den. I really mean “taking over”! One of those things was the ironing board. So, he cut me a piece of particle board that was in the shop. We just measured the top of the cabinet. Which is more than 30 inches. I really wanted to have a bit more than 30 inches in width and enough length to cover the top of the shelves.
IMAG0483
I cut a piece of fabric about 4 inches wider than the board. I laid it on the floor wrong side up.  Then,  I cut the  insul-bright to dimensions of the board and  placed the insul-bright silver heat resistant fabric shiny side down in the middle of the fabric. I cut two layers of cotton batting to dimensions of board and laid it on top of the insul-bright. Now, I placed the board on top of batting. At this point, I just tucked and safety pinned the corners. I can wash it I need to or change it out as I wish. I like the options. You could staple it down.
                                                                                  IMAG0491
I had a table that was being borrowed until I could get  a cutting table of my own. My hubby made the rolling cart about 5 years ago when we live in a super small house. It was 1000 square feet or something like that. 3/1 and the kitchen was a small square. 8*8 possibly. This has locking wheels too. I love that. Now, we have a much bigger house and a wonderfully spacious kitchen. So, why not repurpose here. The mat is 36*24. We made the cut about 6 inches wider so I could have some space to put tools and such on the top. It is just particle board. We didn’t have any hard board or plywood. I will fancy it up when I can catch a breath. Multipurpose!
IMAG0513
    I also just wanted to check out the newest fabric that I got at Joanns on sale. I love a good sale. I mean, who doesn’t?  I love that place.
I got 1 yard of each. I have some red cotton that was leftover from Kenzie’s shirt.  I also used some off white. I didn’t care for that too much. So, I got a nice blue that will go better, instead.
Disappearing Nine Patch Block                        IMAG0501

                                                                                                         IMAG0515

I cut 1- red 4 inch block 4- 4 inch blocks of the large pattern flowers 3-4 inch blocks of the blue with the row of smaller flower border print. 1-4 inch square of the white with pattern.
      I didn’t actual take the pictures in the beginning of putting the block together. So, I will try typing through it. Just take the upper left corner flower print  and put it right sides together with middle block.  Sew the seam on the left side of the middle block. Open and press. Then take the flower print on the right and lay it right sides together on the middle block. This time, sewing seam on the right side of middle block. Open and press.  One all the rows are sewn in this method. You will have the first picture on the left.

 IMAG0494IMAG0496
Place top row onto middle row. Right sides together. Sew seam along the top edge from left to right.  Open and press. Shown below on left. I then, placed the bottom row right sides together and sewed seam along bottom edge of the middle section from right to left. I hope you got all that. I really sounds harder than it is to do.
IMAG0497IMAG0499
Then, I cut right down the middle at 5 3/4  and then across at 5 3/4 without moving the fabric.
Now, you have your disappearing 9 patch. It’s  ready to be sewn back together forming a different pattern.
IMAG0501IMAG0502IMAG0503

I haven’t decided yet which one I am going to stick with yet. I am leaning toward the middle photo. I really just wanted to see it. Immediate satisfaction.  I ended up using 2 squares to make a heating rice pad. My son got an earache. Poor baby.  I couldn’t find the ear drops, and I was out of sweet oil. I took two of the blocks and put them right sides together sewed a seam around the edges. I left an opening at the top. I poured about 1 1/2 cup of dry rice in the pocket. Then, I sewed it shut. Simple, and it worked!
IMAG0528 This is it. You just put in microwave for 30 seconds til it gets warm. Make sure you move it around a bit to check that the inner rice grains aren’t to hot. I checked it on my skin, and it was a little hot when I took it out. I let it cool a bit before I put it on his ear. The next day, he was such a fan of  the rice pack. He’s a silly goose.
I just need to make some minor adjustments to the block by block quilt.  Now that the house and truck are clean. I can get some sewing done. Yay! Blog at you later.

Kids Crayon Initials


IMAG0074

I saw these initials framed on pinterest. I decided to give it a try with Terrie Campbell (sister-in-law) and her daughters. First, we had to get the initials printed.  We used this website. http://printerprojects.com/alphabet/letters.html. I also used word to find a font and size. That would’ve worked as well set at 700.

I picked up some light blue cardstock at joanns for .64. I cut it down to 11X14. I intend to get some shadow boxes for the finished product.  It took quite a bit of crayons. I cut them on a cutting mat with a sharp knife. I rolled the crayon as I cut them, and they broke pretty even.  I used craft glue. Terrie used Elmer’s glue. They both worked well.

IMAG0068

Here’s the M for Mackenzie. I cut this out.

IMAG0069

IMAG0070

Here’s the J for Jared.

IMAG0071

After I cut it out. I centered the J on the paper and used pencil to trace it out on the blue background.

I didn’t take a picture of this part. I took the white cut out letter and used this as a cutting guide and laid the crayons out on it as well. IMAG0080

Here is Jared’s finished product. He even spread the glue.

IMAG0081

Here’s Kenzie laying down the crayons.

IMAG0082

She is spreading the glue around to make sure that they stick to the cardstock. I love getting messy.

IMAG0083

It didn’t take that long at all to get them all laid out.

IMAG0084

Here is Kaitlynn (Kenzie’s cousin) making hers.

IMAG0087

It’s complete.

 IMAG0091

They all did a great job.

Me and Terrie are trying to do a weekly project with the kids during summer. I know that they get bored. I like to include them in some activities and play dates. It gets me and them out of the house.

IMAG0096

I just got this flower fabric for $3.00 yard at joanns. I turned these into curtains in a few hours. I love them. They turned out really well.

IMAG0099

Here they are set up in the living room. I just have to make some pillows to match. I mean, why not? The fabric was so cheap. It really is starting to turn into a home. Home sweet home. Blog at you later.

Our New Home

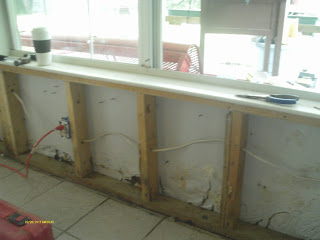
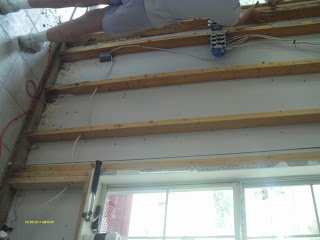
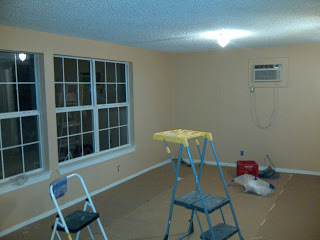
 These are the photos from the den remodel. We had to take it down to the studs. It was alot of work. It took 7 whole days from start to finish. It was some 14 hour days and lots of sweat.

 This is a huge room. There was some termite damage that needed repairs.

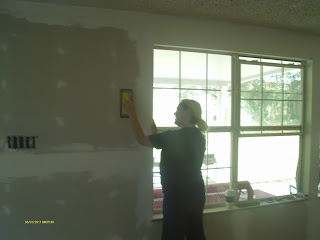
 This is us mudding the drywall that we put up in the den.

 Waiting for mud to dry took up a whole day. Then, you have to sand and restart the process 2x’s.

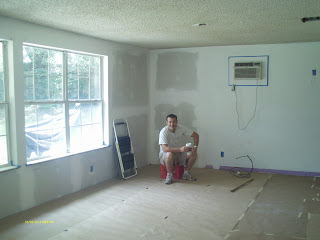
This is Jason on one of our breaks.
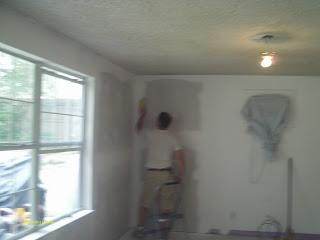
The ceiling was yucky, and this photo you can see where the paint has been and where it hasn’t. Next, we put in baseboards, framed the doors and windows,and began painting the walls.

.

This is what it looked like by 10:00p.m. I went ahead and painted the trim and baseboards the next day.

 Here’s the wall hanging I did the following week. It turned out really well.

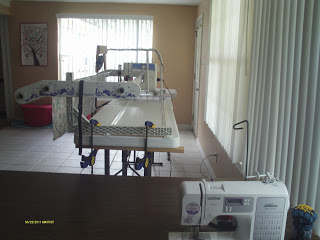
Jason made a recess for my machine, and now I have this huge table extension. He is awesome.
Add caption

           I quilted it on the frame. I love this thing. All I can wish for now is a midarm.

The paint on the walls are done. Next is painting trim and baseboards. We have been so busy with the house. I am so glad that this room is done. I have my sewing stuff in there. Yay! The frame is set up for quilting. I even did a wall hanging and got it done in time for the house warming party. Hopefully, I will not have to do this again anytime soon. It is time consuming and just flat out exhausting. We got it done though, and it is beautiful. I have plenty of room for sewing and Jason has room for his office area. We just need some furniture. Well, blog at you later. 

Blueberry Breakfast Cake

107
I am still working on the next project. They don’t always work out. This Blueberry Breakfast Cake is the second attempt.  I am glad I gave this recipe  another try. It is AMAZING! It’s not to sweet. I love me some blueberries. I got recipe here.
http://www.alexandracooks.com/2011/06/29/buttermilk-blueberry-breakfast-cake/
I did make just small adjustments. So, lets do this.
You will need:
½ cup unsalted butter, room temperature
1 tsp. lemon juice (I don’t keep lemons. So, I substituted here.)
almost 1 cup minus  1 tablespoon sugar for sprinkling on top.
1 egg, room temperature
1 tsp. vanilla
2 cups flour
2 tsp. baking powder
1 tsp. kosher salt
2 cups fresh blueberries (about 11 oz container will work)
½ cup buttermilk Before we get started, here are the tips for this recipe. I did frozen blueberries.  They need to be dry or as dry as you can get them. It will not cook right ( I botched that up, the first time.) Also, I didn’t have buttermilk the first time. So, I put the lemon juice in the milk and let it sit. The second time around, I just used buttermilk. I don’t know if it will make a difference to the taste or texture. I also used salted butter, and I could tell the difference. So, I would highly suggest that you use salted butter as well. This time, I didn’t want to take a chance. The original recipe calls for 9×9. I used 8×8.  Aparently, I have 3 that size. Thank goodness, it came out very good. The smell while cooking is mouth watering!
Snapshot_20120130
Preheat oven to 350 degrees. It will cook about 35 to 45 minutes. You will need to cream the butter and sugar. I cheated on room temp butter. (20 seconds in microwave) You will need to keep a close eye on it though. Just mash the butter and sugar together, until they are really mixed. Combine egg and vanilla. Mix in  the remaining flour, baking powder, and salt. While adding flour, alternate with buttermilk. Seperately,  mix  blueberries  with ¼ cup of flour. Now, mix in the blueberries. Make sure that they are mixed throughout the doughy mixture. The dough should be like a thick consistency like a cookie or bread dough.  Grease or pam the bottom of the pan. I smoothed the dough flat. My son, Jared, was helping me today. 🙂 Snapshot_20120130_3 Bake for 35 to 45 minutes. I baked this for about 45 minutes. I checked on it twice after 35 minutes. It should become golden brown, but not to dark on top. 107 It could’ve stayed in a bit longer, but I like my cakes to be just a little moist. Let this sit 10 to 15 minutes after it comes out of the oven. The blueberries are slightly melted and very hot.
112
It looks beautiful! I only made nine slices. Haha! Jared enjoyed it too. If I could impress upon you the goodness. Mmmm..mmm.
115
Alright, my tummy is satisfied.  Now, it’s time to clean and sew. Back to the grind. I hope you try this one! I know, I will be making this again.